
GABC Tutorial – Part II
At the end of Part I I challenged you to enter up to, but not including, the last word of the third line (“ejus”) of our score. If you did everything correctly, then you should have something which looks like this:
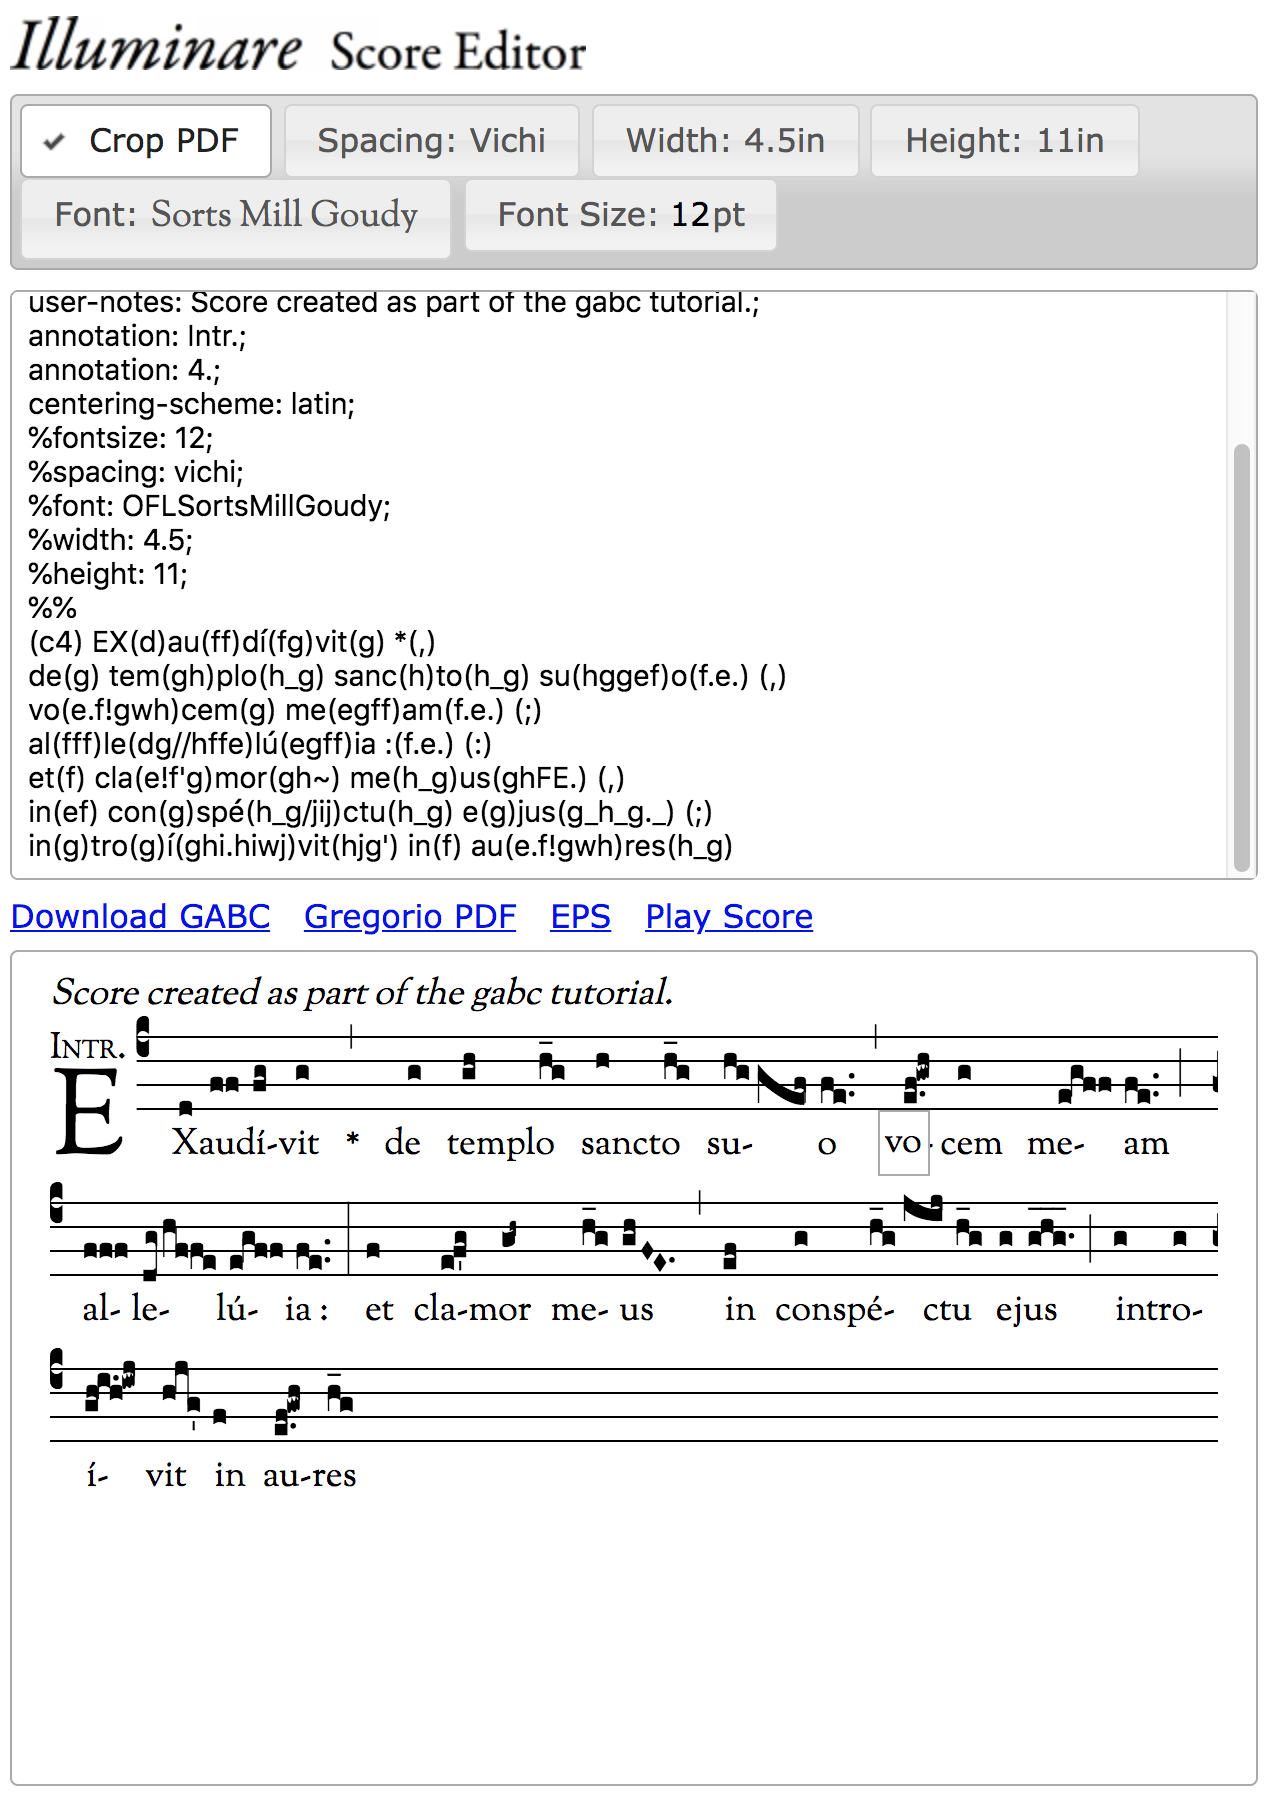
If you need it, here’s a link to our original score.
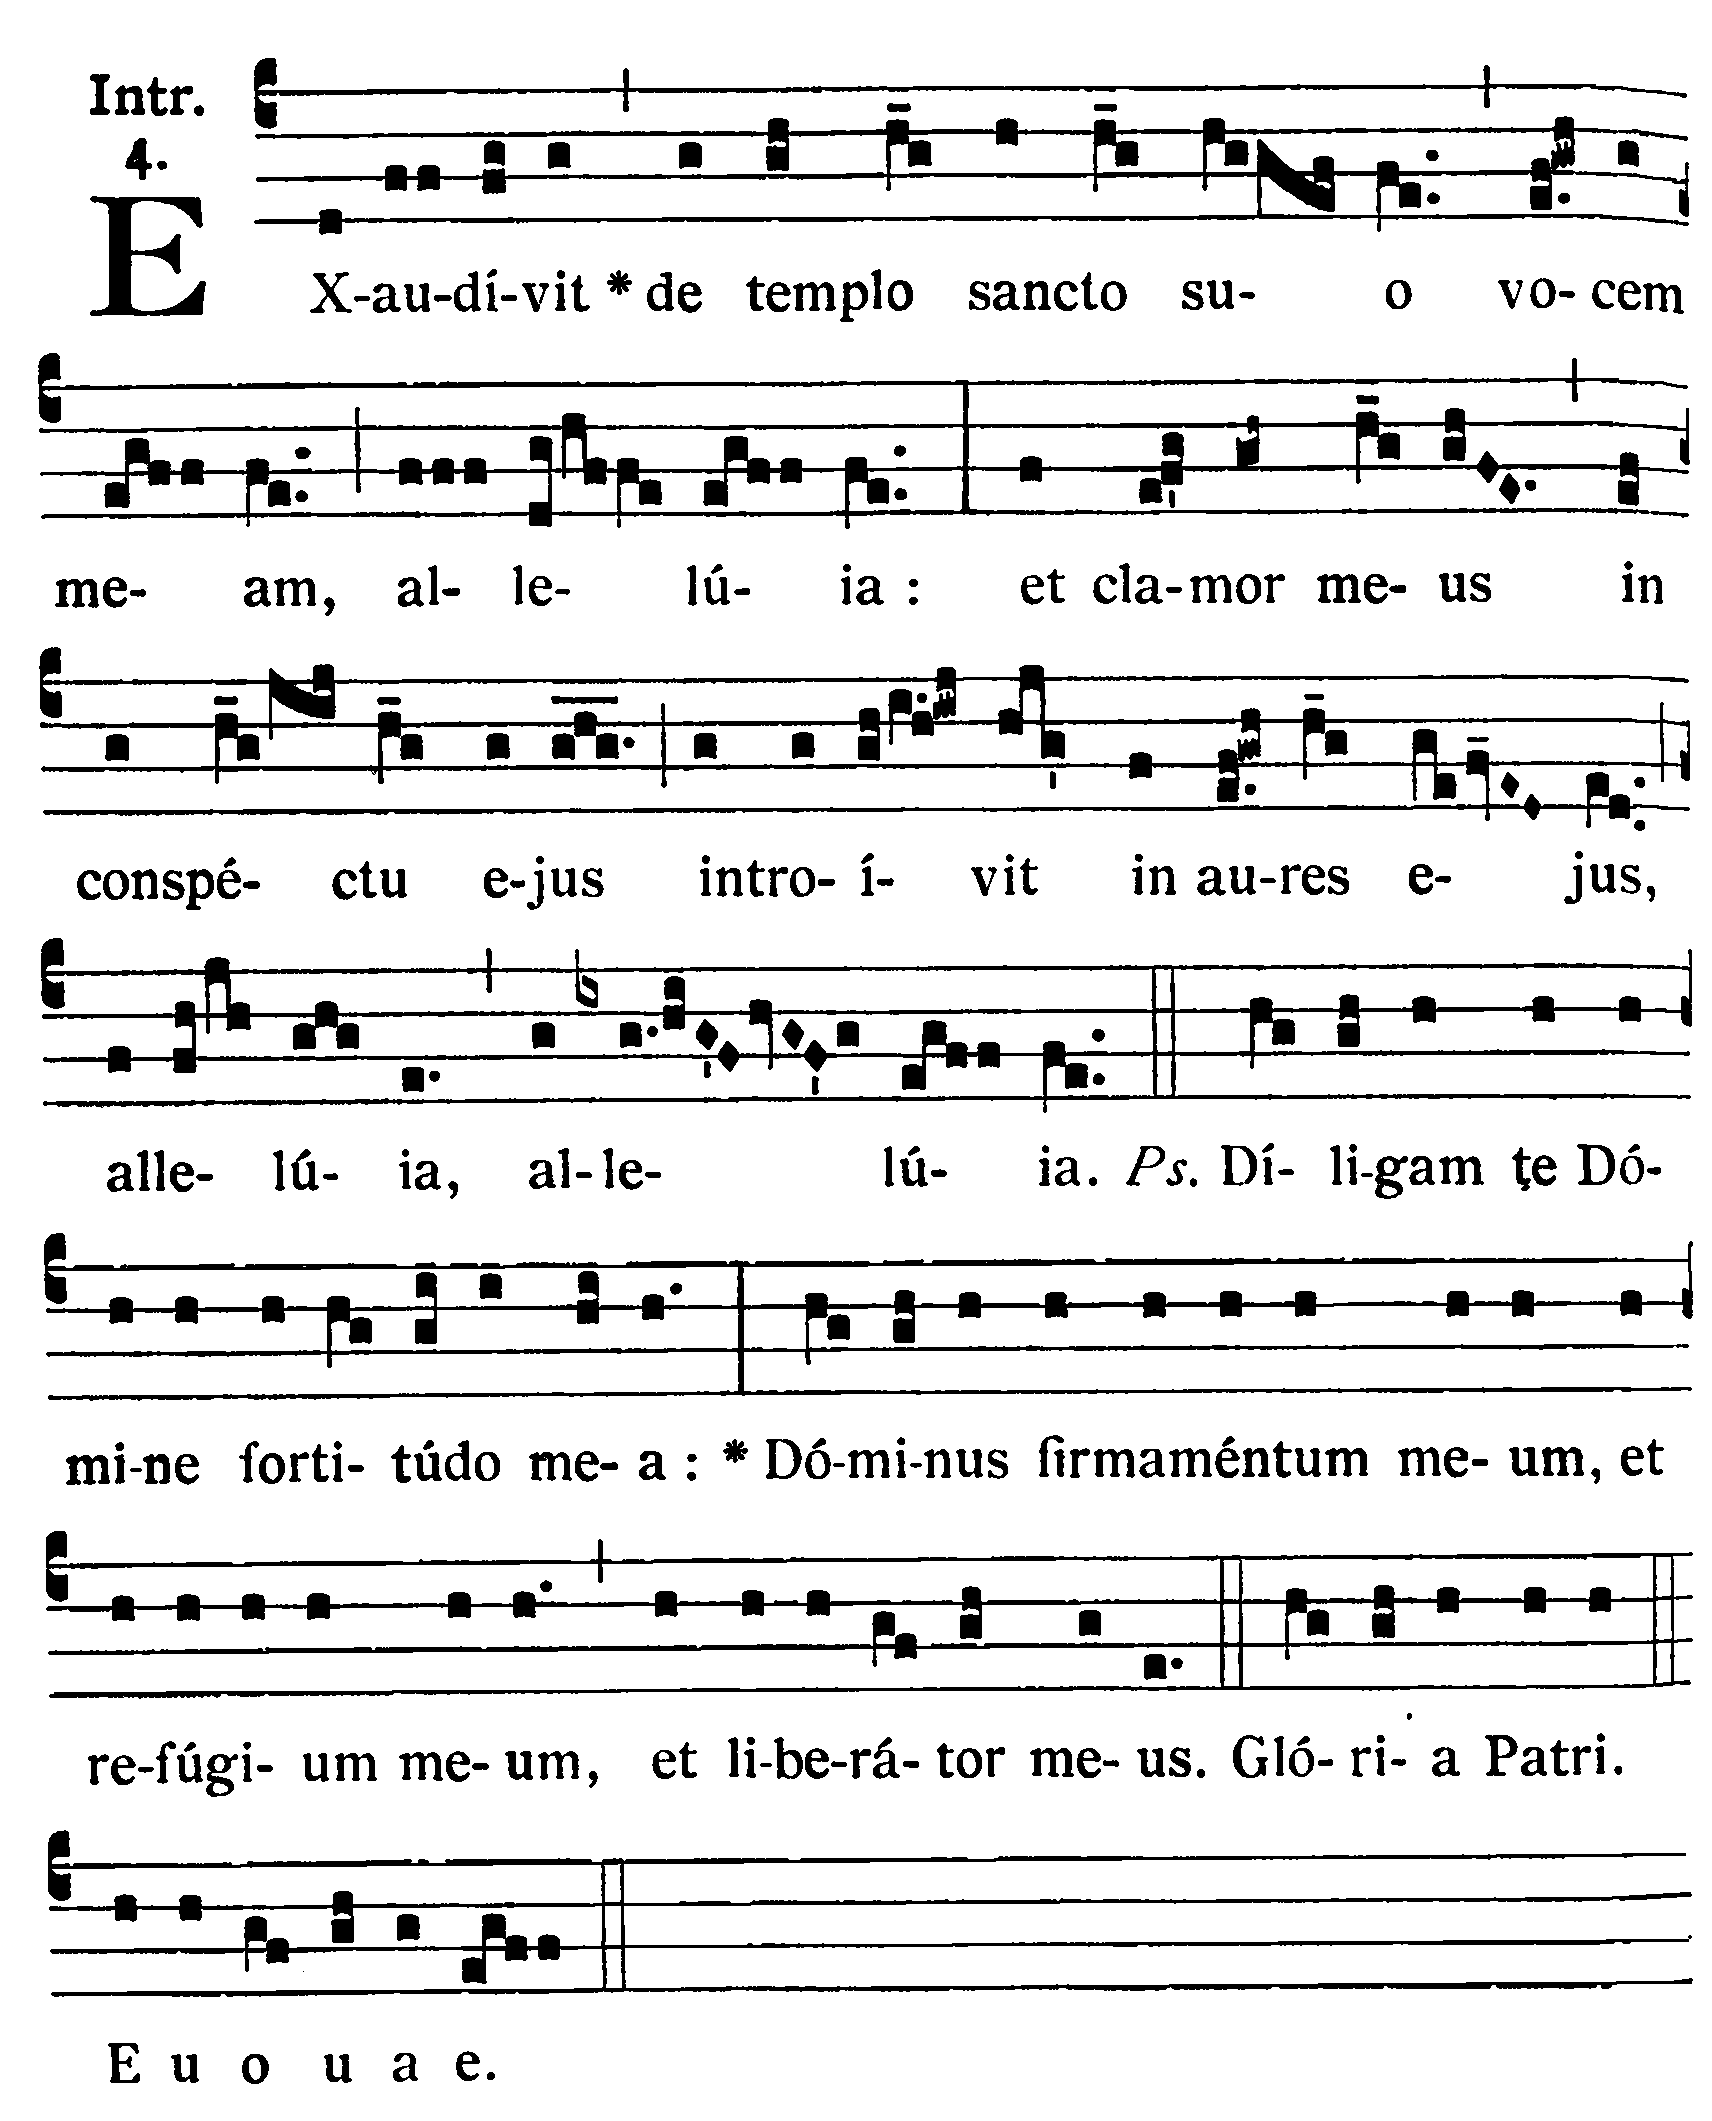
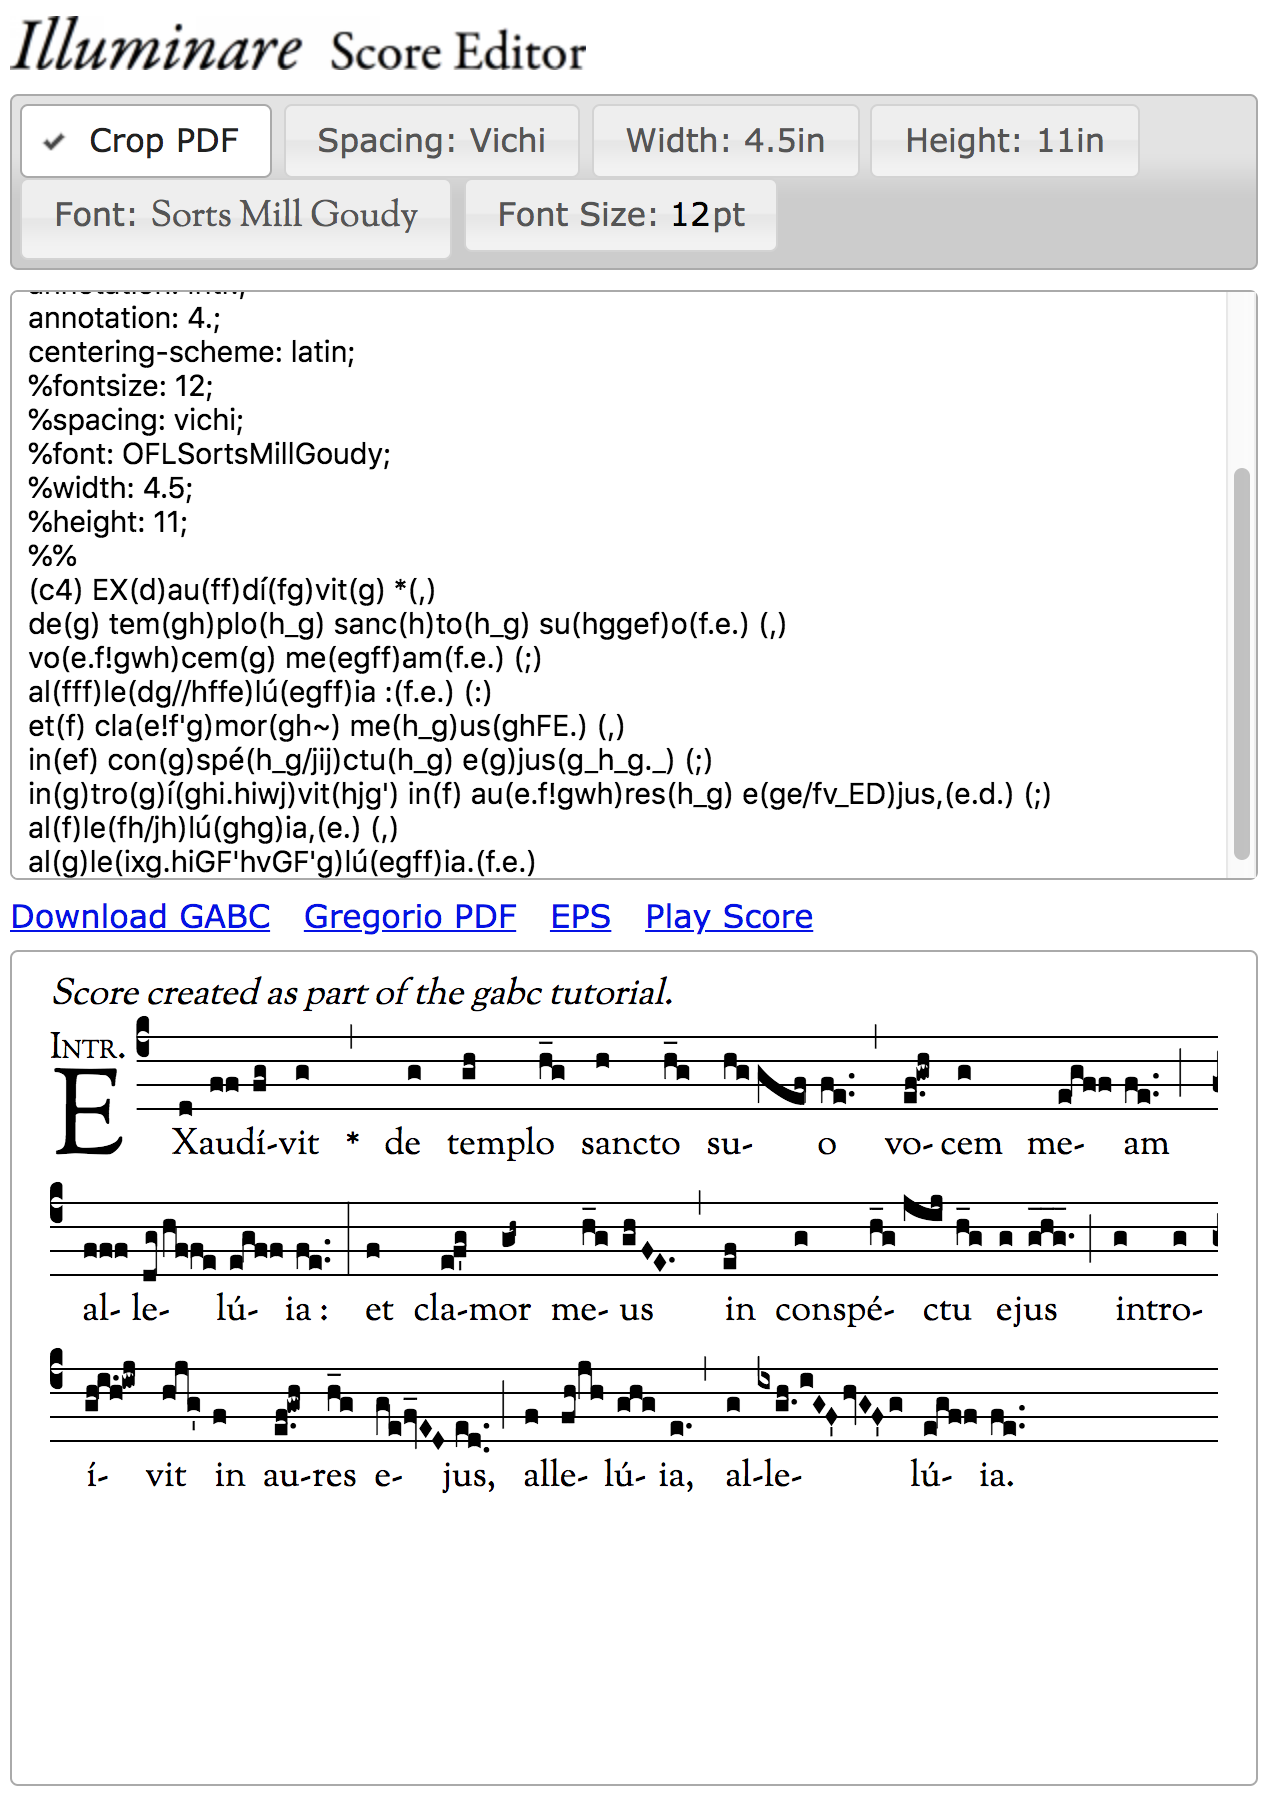
Now let’s take a crack at that last word. To start input the text and notes (and the bar line that follows) without worrying about groupings or spacing (do take care of the punctum inclinati and horizontal episema, however):
Looking at the results its obvious that Gregorio is not grouping the notes correctly in the first syllable, so the first step is to demarcate the groups. We could use the exclamation point (!) for this, but if you recall the exclamation point is a no space group boundary and there is clearly a space in our score between the groups. As a result we need to indicate that space instead:

Having done that, we find that there is still a problem with the output: we’re missing that stem hanging down on the right side of the note just after the space. This is called a virga and is indicated by appending a v to the note:

While virgæ are not all that uncommon, Gregorio is usually fairly good about inserting them automatically. In fact if you look back through the notes we’ve already entered there are several which have a virga on the left side of the note that Gregorio put in for us. As a result, you should always try to enter a sequence of notes without specifying the virgæ first, just in case it’s added automatically. It’s only when Gregorio fails to see the need for a virga that you should manually insert the v (or V for a virga on the left-hand side of a note).
Looking ahead, our next challenge occurs in the second “alleluia” of the two coming up. The second syllable has a flat as part of the glyph. Flats are represented by x and if you’re familiar with modern notation your instinct might be to put that x directly before the note which should be sung flat:
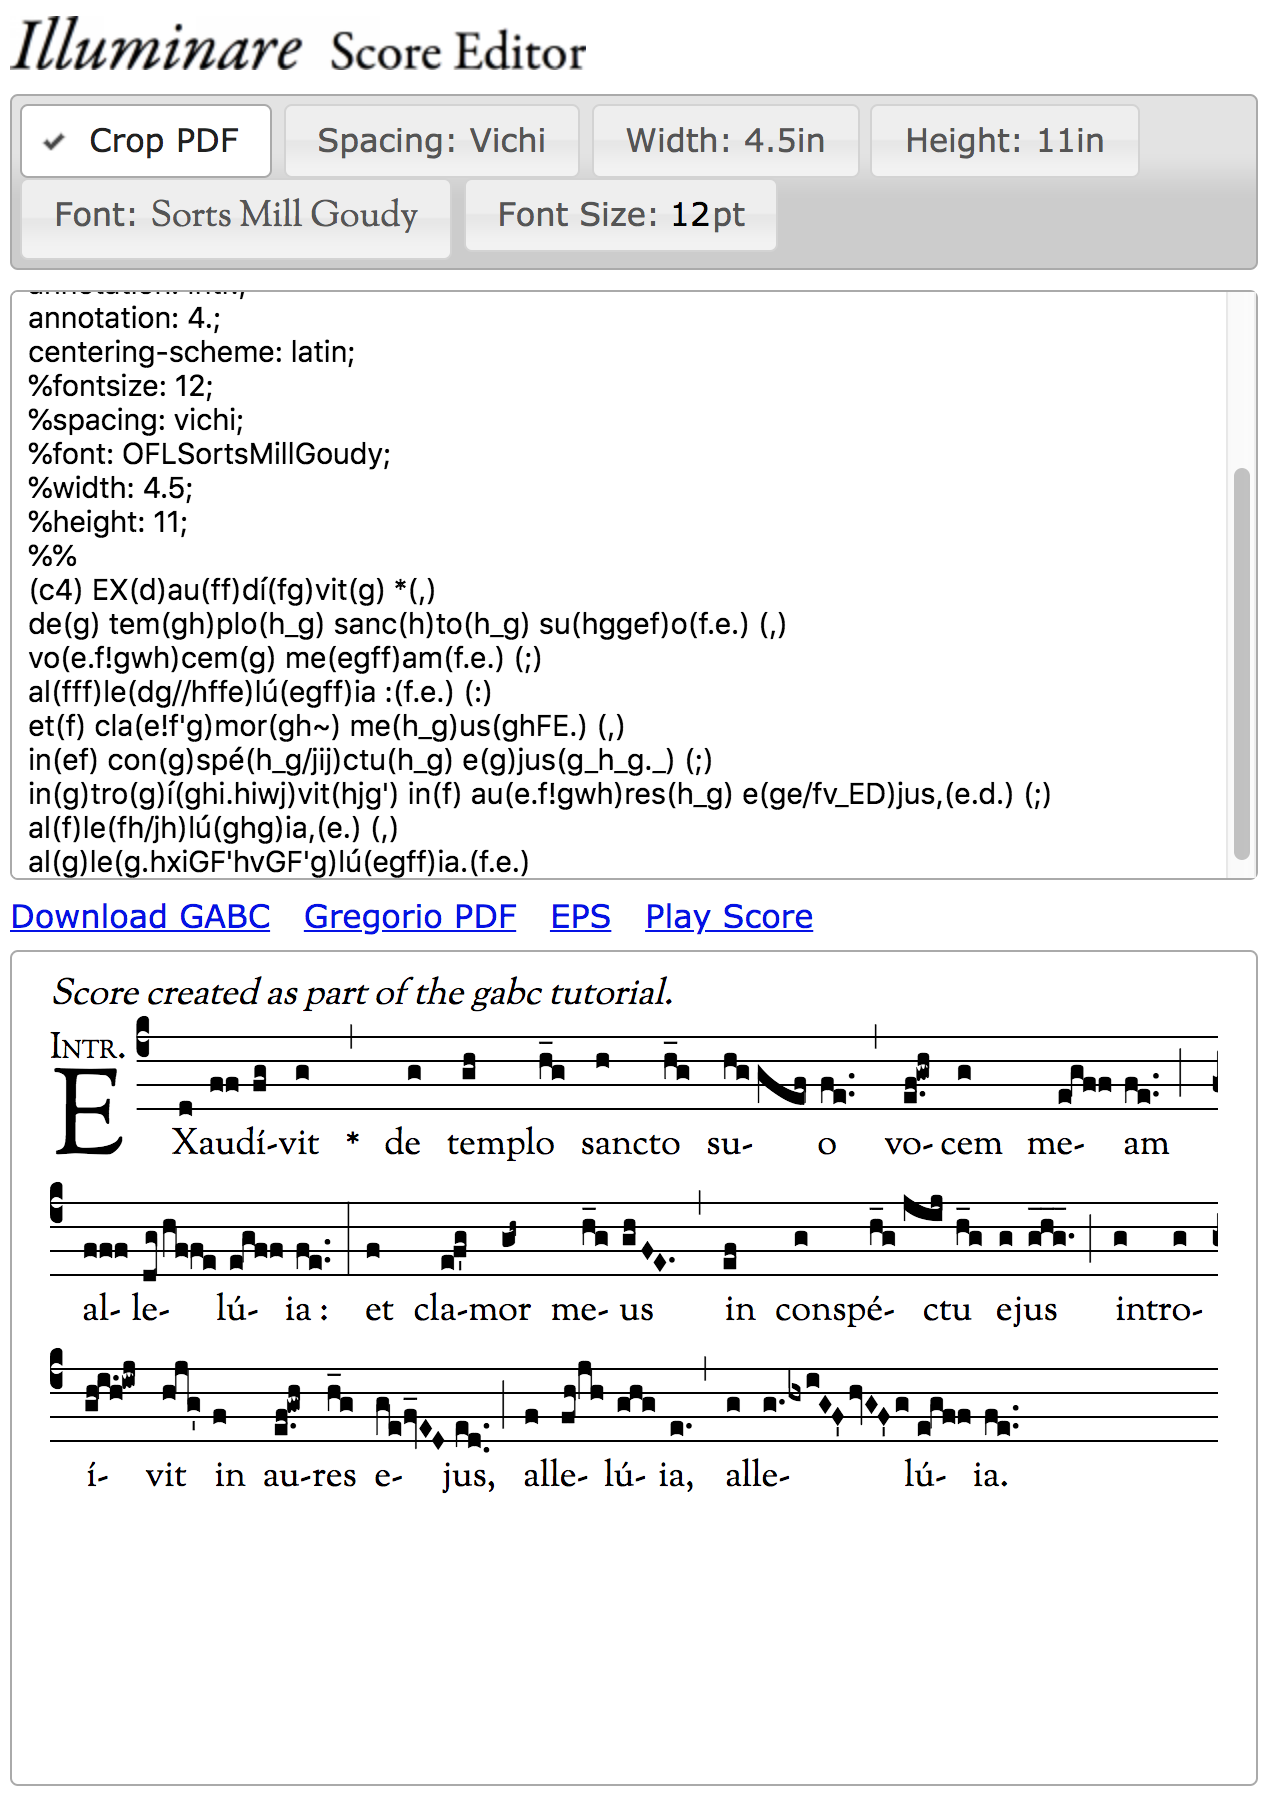
Well, that didn’t work. Instead of applying a flat to the desired note, it’s turned the previous note into a flat. This is because Gregorio treats a flat as a special note shape. We thus need to add two letters to our sequence: a pitch to indicate where on the staff the flat is to occur (in this case a i) and the x to indicate that said “note” is actually a flat. Furthermore, we must put it where we want it to occur in the sequence of notes. This means putting it before the first note:
Having done that we can now see that Gregorio is not grouping the notes in that syllable correctly and thus we need to force a regrouping. Due to the punctum mora on the first note, we cannot use an exclamation point (!) because then the next note, which is only a single step higher, will overlap with the punctum mora. Instead we have to use a space and indeed we need enough to get past the punctum mora:
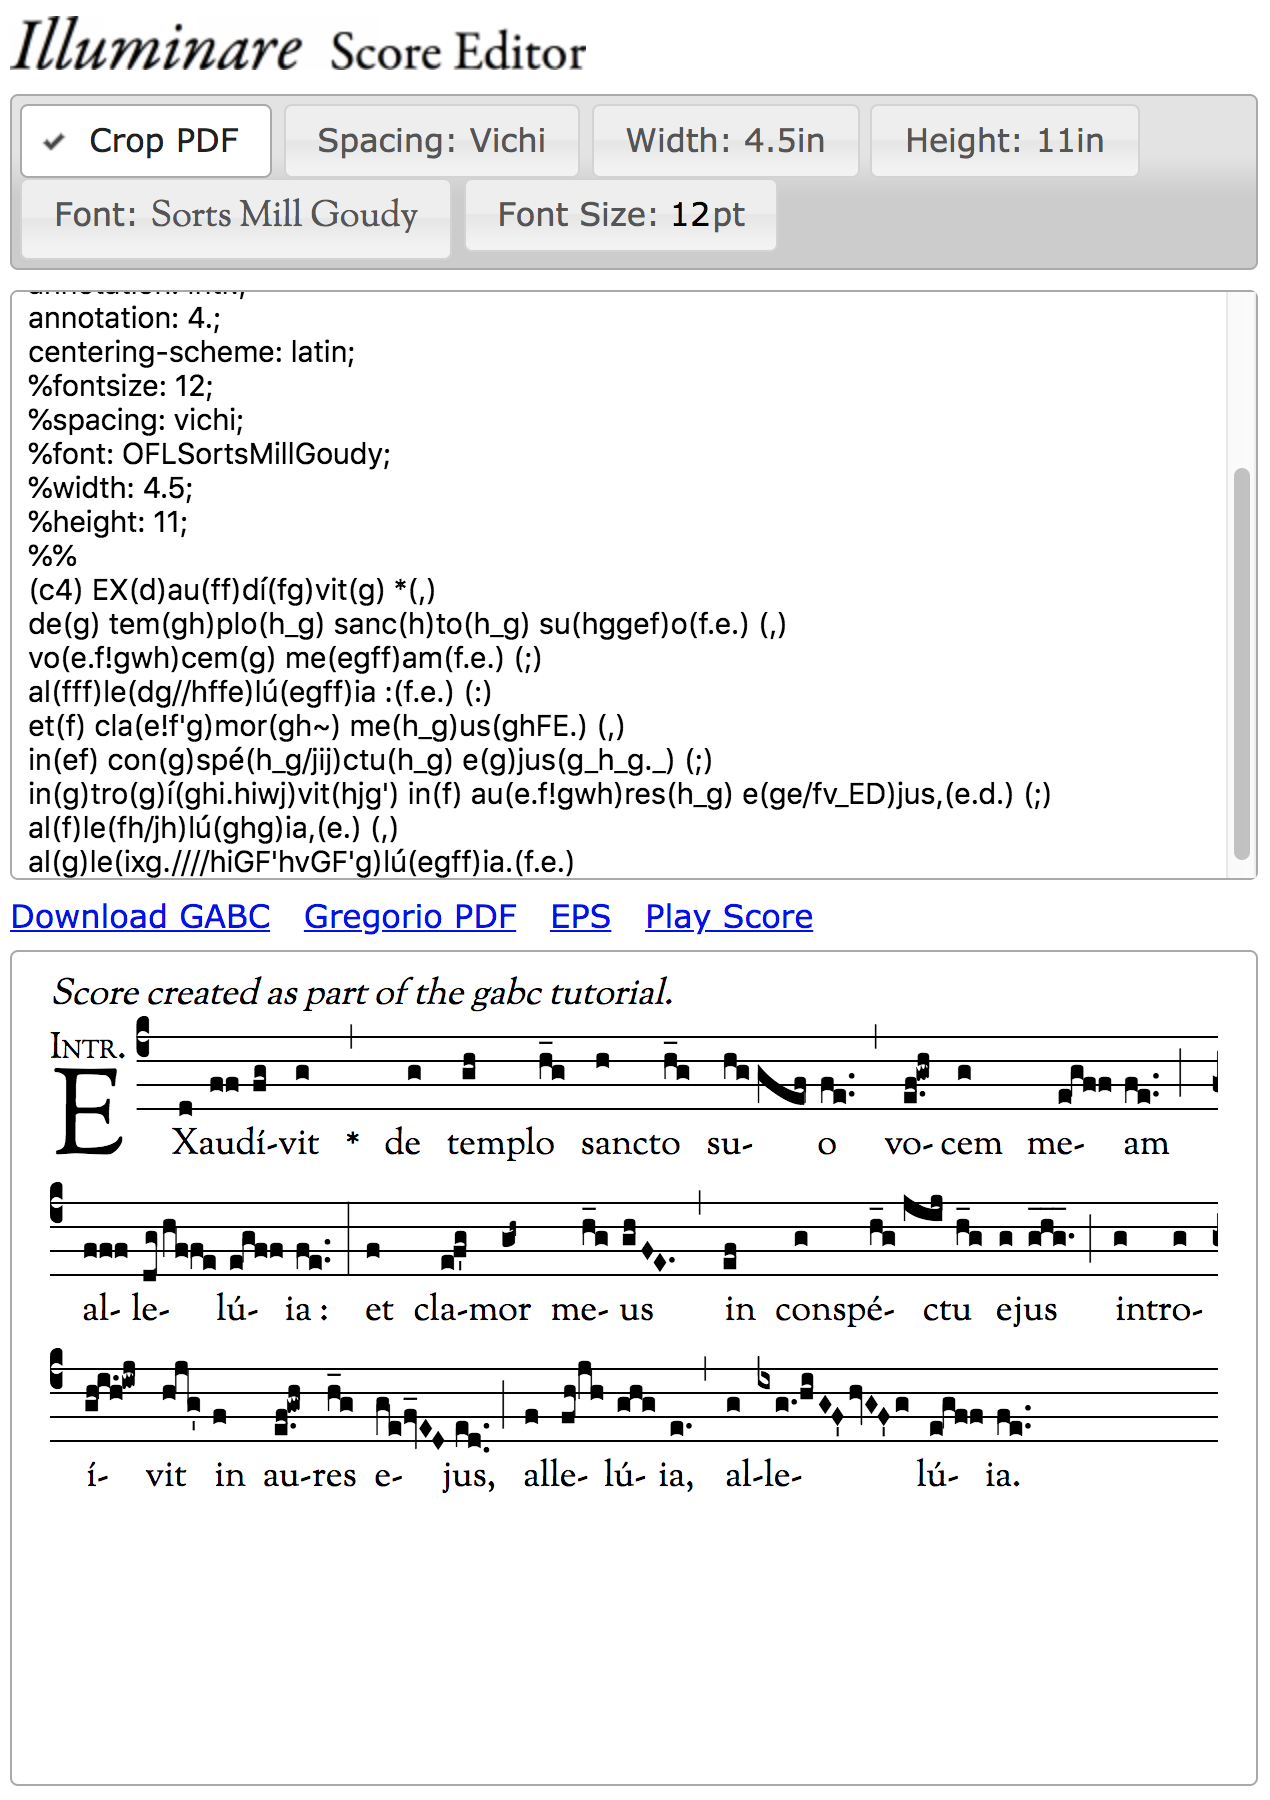
That probably seems like an excessive number of forward slashes (/) to be typing but that’s how many we need. In more recent versions of Gregorio support was added for an arbitrarily scaled space (/[<factor>]) but this is not available in the version that Illuminare runs, and besides it wouldn’t save us any characters in this case (both //// and /[4] are the same number of characters).
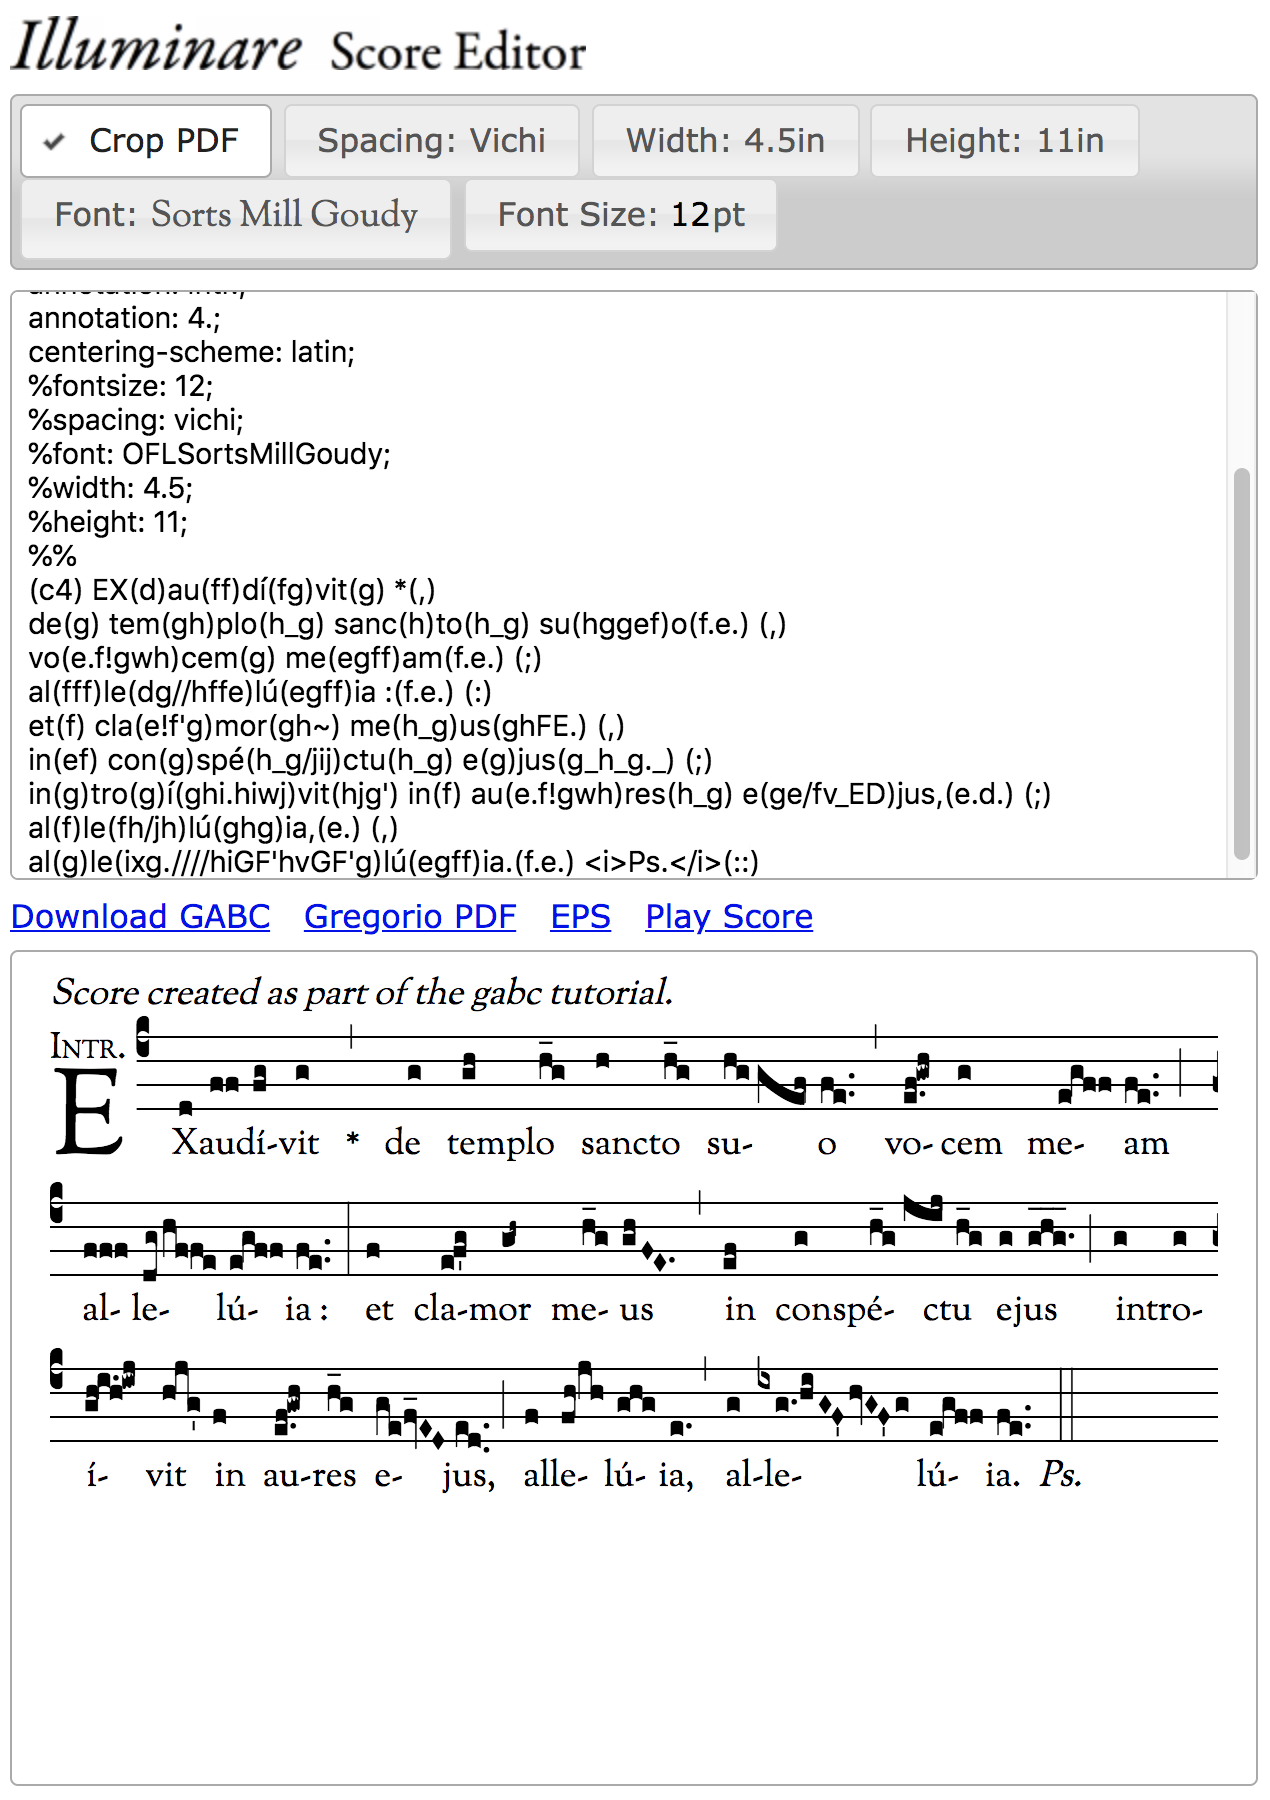
Our next challenge is the double bar line after the “alleluia.” Or rather, the text below it. The double bar line (called a diviso finalis) is, as you might expect, represented by two colons (::), one for each bar line. The text below, however, is unusual because it is italicized. Gregorio handles such text styling the same way that html does, with tags: <i>Ps.</i>. Similar tags exist for other styling options (though we don’t need them here):
At this point you should be able to enter the rest of the score using the techniques we’ve gone over so far. As a result I’m going to challenge you to do just that before going on to the next part of the tutorial.